
In my previous blog post I discussed how to create a Mp3 recording from a VoIP call over the internet. This blog will discuss the concept I’ve been asked the most questions about:
Wait. Auto-transcribe… for free. How did you manage that?
Well, gentle reader, It’s not the easiest thing to imagine doing.
There are a lot of pay-services for transcription who will do a much better job. However, if you’re like me: Strapped for cash and required to do you own transcription, you can use this trick.
Stage 1: Setup
First you need to make sure you have acquired/done a few things. Click the hyperlinks to find out more.
- Made an Mp3 recording of your interview.
- Decided on the transcription style you want to use. – As a note this method wont work for verbatim style transcription as YouTube edits ‘Um’s’ etc. out.
- Registered and Activated a YouTube account – activation is not necessary for transcription’s under 15 mins but I had an hour long interview so…
- Familiarised yourself with YouTube’s privacy settings – lest you broadcast a private interview to the masses.
- Worked out how to turn your Mp3 into an Mp4 – I used this handy converter but I’ve seen anything from using Windows Movie maker to coding the FFMPEG facility on your desktop. In short; you take an image and merge it with your Mp3 to make an Mp4. The format that YouTube uses.
- My post-YouTube method uses Word and Excel but I imagine you can do some similar tricks with open office.
Stage 2: YouTube
If, like me, you are a novice to YouTube here’s some pointers on how to upload your video. This is also a good point to check your privacy settings are the correct ones. Avoiding the aforementioned broadcasting issue.
Once you’re in the creator studio things look a bit like this:

You’ll notice my Mp3 interviews uploaded in the centre square, if you select one, YouTube takes you to a screen that look like this:
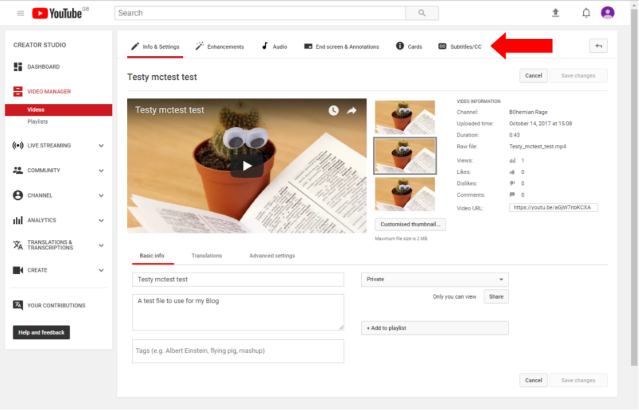
Note my handy red arrow, select the Subtitles/CC option from this screen and it will open the captions.
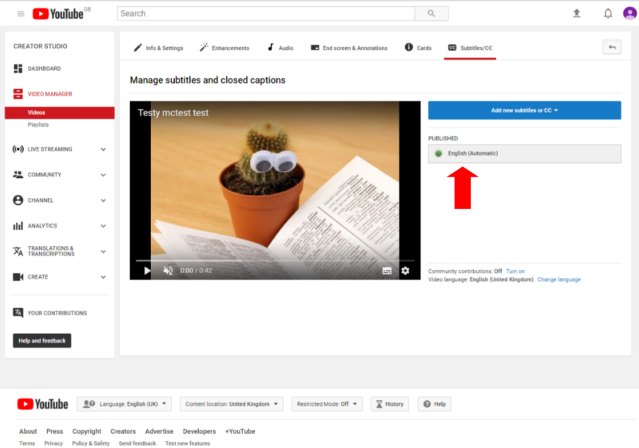
NOTE: If your auto-captions aren’t there. Don’t panic! Go make a cup of tea and come back and check again, sometimes it takes a little while to crunch your captions.
You are looking for the ‘English (Automatic)’ option (below) click on it.
Select the ‘Edit’ button and your screen will allow you to edit the Auto-transcribed captions.
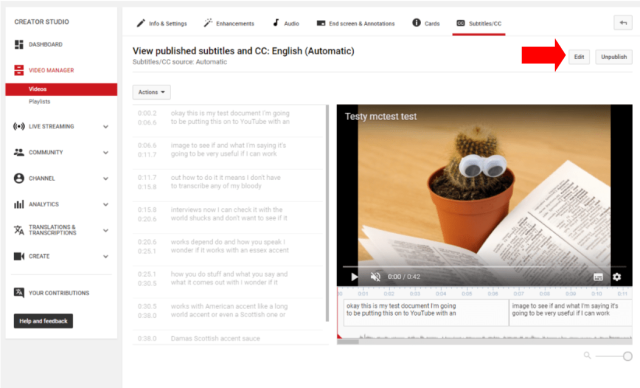
I personally like to select the ‘pause when editing’ function at the bottom as it makes things easier.

Once you’re set up you can select the dialog on the left and edit (remember to save regularly in case of internet issues – learn from my mistake).
YouTube’s auto-transcriptions are pretty good (thanks to our Google overlords) but they’re not perfect. They lack any punctuation/grammar and sometimes create hilarious mistakes. So it’s important that you edit.
TIP: I put an ! to note a change in speaker. This is a VERY good idea for later when you need to separate things out in stage 3.
Once you’ve edited. Congratulations you have completed stage two!
Stage 3: Extracting and formatting
So you’ve created your Mp4 and edited the auto-captions on YouTube. Now for the best bit, turning your work into an interview transcript that works. There is no way to do this without proofreading. If you want to trust the computer you can but, I think it’s a bit reckless.
Download your captions.

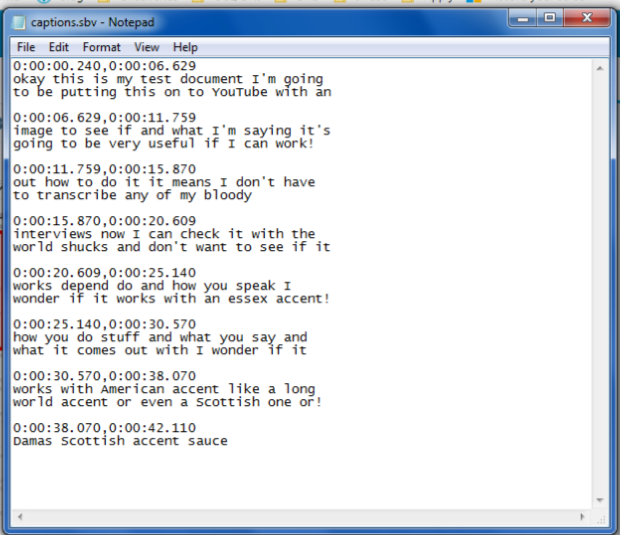
This file will not open! You need to open notepad and drag and drop the file in. At which point you get something that looks like this:
Open excel and copy this in once you get that you can do some quick editing hacks. Now you can just edit this by hand but if you have a huge document like I did this will speed things up.
- Using wildcards (in Excel this is *) like this: *:*:*.*,*:*:*.* find and replace (Ctrl H) the time signatures with a blank cell.
- Remove any blank cells using this handy trick.
- Highlight the cells remaining and transpose them into another worksheet allowing you to paste into word without applying a strange format.
- Paste into word using the ‘keep text only‘ option to remove any lingering formatting.
- Find and Replace the ! with a paragraph mark (copy this: ^p into your ‘replace’ field).
- Copy newly paragraphed document BACK into excel.
- At this point you may need to TRIM your speech section as there will be a space at the front.
- Add another column and assign a speaker to each section – In my case it was an interview between two people so I just dragged it down using excels Autofill function.
- Paste this back into a word table.
- Proofread the result to check each section makes sense and the correct people are highlighted as speaking.
Voila. You have a transcription that you didn’t have to type up one word at a time.
Now I’m not going to claim that this technique is easy, but once you get the hang of it you can get long transcriptions done very fast. I did an hour long interview in two hours from interview end to final transcription, including compiling time for YouTube and converting from Mp3/Mp4.
Got a quicker method? Found a spelling/grammar/general mistake in this post? Please comment and let me know. I also respond well to gratuitous praise about how this made your dissertation/assignment easier (I know it made mine MUCH easier).
Next up: Library lists on Twitter
Sarah out.

Just stopping by with some gratuitous praise: this has been really helpful for my project! It’s definitely intensive but much less-so than having to transcribe by hand. Thanks for sharing!
LikeLike
Thank you! Glad it helped. I imagine the youtube interface is a bit different now but the basic principles for this extraction still works!
LikeLike